前端代码:
<view class="row">
        <view class="text1">证件照:</view>
        <image class="zp"  src="{{zjz}}" mode="aspectFill" name="zhengjianzhao"></image>
        <button class="upload-img-btn" bindtap="chooseImg" type='primary'>拍照  / 上传</button>
    </view>
js代码:
// pages/xggrzl/xggrzl.js
const db = wx.cloud.database()
const app = getApp()
Page({

  /**
   * 页面的初始数据
   */
  data: {
    openid: '',
    userInfo: '',
    array: ["大一", "大二", "大三", "大四"],
    array1: ["计算机科学与工程学院", "电子信息工程学院"],
    xy_index: 0,
    nj_index: 0,
    imgs:[],
    zjz: '',
    img: ''
  },

  /**
   * 生命周期函数--监听页面加载
   */
  onLoad: function (options) {
    const app = getApp()
    var openid = app.globalData.openid
    this.setData({
      openid: openid
    })
    db.collection("user").where({ openid: this.data.openid }).get().then(res => {
      console.log(res.data)
      this.setData({
        userInfo: res.data
      })
      console.log(this.data.userInfo[0].nj)
      for (let i = 0; i < this.data.array.length; i++) {
        if (this, this.data.array[i] == this.data.userInfo[0].nj) {
          console.log(i)
          this.setData({
            nj_index: i
          })
        }
      }
      for (let i = 0; i < this.data.array1.length; i++) {
        if (this, this.data.array1[i] == this.data.userInfo[0].xy) {
          console.log(i)
          this.setData({
            xy_index: i
          })
        }
      }
    })
  },

  // 上传一张图片
  chooseImg: function (e) {
    /* const app = getApp()
     var openid = app.globalData.openid
     this.setData({
       openid: openid
     })
     db.collection("user").where({ openid: this.data.openid }).get().then(res => {
       console.log(res.data)
       this.setData({
         userInfo: res.data
       })
       if(res.data.openid==app.globalData.openid){
         */
    var that = this;
    let openid = app.globalData.openid || wx.getStorageSync('openid');
    console.log(openid)
    // const filepath=this.data.img
    wx.chooseImage({
      count: 1,
      sizeType: ['original', 'compressed'], // 可以指定是原图还是压缩图,默认二者都有
      sourceType: ['album', 'camera'], // 可以指定来源是相册还是相机,默认二者都有
      success: function (res) {
        console.log(res.tempFilePaths)
        let filePath = res.tempFilePaths[0]
        wx.cloud.uploadFile({
          cloudPath: (new Date()).valueOf() + '.png',//文件名 //云存储图片名字
          filePath,//临时路径:filepath
          success: res => {
            console.log('[上传图片] 成功:', res)
            console.log(res.fileID)
            that.setData({
              img: res.fileID,//云存储图片路径,可以把这个路径存到集合,要用的时候再取出来
              // zjz:res.tempFilePaths
              zjz: res.fileID
            })
            let fileID = res.fileID;
            // that.upload(res.fileID);
            db.collection("user").add({
              data: {
               zjz: fileID//数据库会新增一个记录
              //  zjz:filePath//数据库不会新增一个记录
              // zjz:this.data.concat(filePath)
              }
            })
          },
          fail: err => {
            // handle error
          }
        })
        // }
        // })
      }
    })

  },

  /* upload(filepath) {
     console.log(filepath)
     db.collection("user").add({
       data: {
         zjz: filepath,
       }
     }).then(res => {
       wx.showToast({
           title: '添加成功',
           icon: 'success',
           duration: 2000
       })
   })
   }
 })
 // const db = wx.cloud.database();
*/


  /*chooseImg: function (e) {
    var that = this;
    const app = getApp()
    var openid =app.globalData.openid
    // let openid = app.globalData.openid || wx.getStorageSync('openid');
    wx.chooseImage({
      // filePath: filePath, // 文件路径
      count: 1, // 默认9
      sizeType: ['original', 'compressed'], // 可以指定是原图还是压缩图,默认二者都有
      sourceType: ['album', 'camera'], // 可以指定来源是相册还是相机,默认二者都有
      success: function (res) {
        console.log(res.tempFilePaths)
      //   const tempFilePaths=res.tempFilePaths
        // tempFilePath可以作为img标签的src属性显示图片
        let filePath = res.tempFilePaths[0]
        // const name = Math.random() * 1000000;
      //  const cloudPath = name + filePath.match(/\.[^.]+?$/)[0]
        wx.cloud.uploadFile({
          cloudPath: "证件照",//文件名 //云存储图片名字
         filePath: filePath,//临时路径
          success: res => {
            console.log('[上传图片] 成功:', res)
           console.log(res.fileID)
           that.setData({
              zjz: res.fileID,//云存储图片路径,可以把这个路径存到集合,要用的时候再取出来
              // zjz:res.tempFilePaths
            })
          }
      })
            let fileID = res.fileID;
            //把图片存到user集合表
            const db = wx.cloud.database();
            // db.collection("user").where({openid:app.globalData.openid}).get().then(res=>{
            //   console.log(res)
              db.collection("user").add({
                data: {
                  // zjz: this.data[0],
                  zjz:fileID
                },
              })
            // })

          //     success: function () {
          //       wx.showToast({
          //        title: '图片存储成功',
          //         'icon': 'success',
          //         duration: 3000
          //       })
          //     },
          //     fail: function () {
          //       wx.showToast({
          //         title: '图片存储失败',
          //         'icon': 'none',
          //        duration: 3000
          //       })
          //     }
          //   });
          // },
          // fail: e => {
          //   console.error('[上传图片] 失败:', e)
          // },
          // complete: () => {
          // }
        // })
      }
      // },
    })
  },
  */

 /* chooseImg: function (e) {
  var that = this;
  var imgs = this.data.imgs;
  if (imgs.length >= 9) {
    this.setData({
      lenMore: 1
    });
    setTimeout(function () {
      that.setData({
        lenMore: 0
      });
    }, 2500);
    return false;
  }
  wx.chooseImage({
    // count: 1, // 默认9
    sizeType: ['original', 'compressed'], // 可以指定是原图还是压缩图,默认二者都有
    sourceType: ['album', 'camera'], // 可以指定来源是相册还是相机,默认二者都有
    success: function (res) {
      // 返回选定照片的本地文件路径列表,tempFilePath可以作为img标签的src属性显示图片
      var tempFilePaths = res.tempFilePaths;
      var imgs = that.data.imgs;
      // console.log(tempFilePaths + '----');
      for (var i = 0; i < tempFilePaths.length; i++) {
        if (imgs.length >= 9) {
          that.setData({
            imgs: imgs
          });
          return false;
        } else {
          imgs.push(tempFilePaths[i]);
        }
      }
      // console.log(imgs);
      that.setData({
        imgs: imgs
      });
    }

  });
},
// 删除图片
deleteImg: function (e) {
  var imgs = this.data.imgs;
  var index = e.currentTarget.dataset.index;
  imgs.splice(index, 1);
  this.setData({
    imgs: imgs
  });
},
*/
  bindchangenj: function (e) {
    console.log(e.detail.value)
    this.setData({
      nj_index: e.detail.value
    })
  },
  bindchangexy: function (e) {
    console.log(e.detail.value)
    this.setData({
      xy_index: e.detail.value
    })
  },

  formSubmit(e) {
    console.log(e)
    db.collection("user").where({ openid: this.data.openid }).update({
      data: {
        nj: this.data.array[this.data.nj_index],
        phone: e.detail.value.phone,
        username: e.detail.value.name,
        xy: this.data.array1[this.data.xy_index],
        studentid: e.detail.value.xh,
        // tx:e.detail.value.userphoto,
        // zhengjianzhao: e.detail.value.zjz,
        // zhengjianzhao:e.data.imgs,
        _updateTime: Date.parse(new Date()),
      },
      success: function (res) {
        wx.showToast({
          title: '提交成功',
          icon: 'success',
          duration: 1500,
          success: function () {
            wx.navigateTo({
              url: '../grzl/grzl',
            })
          }
        })
      }
    })
  },

  // 上传多张图片
  // chooseImg: function (e) {
  //   var that = this;
  // var imgs = this.data.imgs;
  // if (imgs.length >= 9) {
  //   this.setData({
  //     lenMore: 1
  //   });
  //   setTimeout(function () {
  //     that.setData({
  //       lenMore: 0
  //     });
  //   }, 2500);
  //   return false;
  // }
  // wx.chooseImage({
  //   count: 1, // 默认9
  //   sizeType: ['original', 'compressed'], // 可以指定是原图还是压缩图,默认二者都有
  //   sourceType: ['album', 'camera'], // 可以指定来源是相册还是相机,默认二者都有
  //   success: function (res) {
  // 返回选定照片的本地文件路径列表,tempFilePath可以作为img标签的src属性显示图片
  // var tempFilePaths = res.tempFilePaths;
  // var imgs = that.data.imgs;
  // console.log(tempFilePaths + '----');
  // for (var i = 0; i < tempFilePaths.length; i++) {
  //   if (imgs.length >= 9) {
  // console.log(res)
  //   that.setData({
  //     // imgs: imgs
  //     zjz:res.tempFilePaths[0]
  //   });
  // return false;
  // } else {
  //   imgs.push(tempFilePaths[i]);
  // }
  // }
  // console.log(imgs);
  // that.setData({
  //   imgs: imgs
  // });
  // }
  //   })
  // },
  // 删除图片
  // deleteImg: function (e) {
  //   var imgs = this.data.imgs;
  //   var index = e.currentTarget.dataset.index;
  //   imgs.splice(index, 1);
  //   this.setData({
  //     imgs: imgs
  //   });
  // },
  // 预览图片
  // previewImg: function (e) {
  //   //获取当前图片的下标
  //   var index = e.currentTarget.dataset.index;
  //   //所有图片
  //   var imgs = this.data.imgs;
  //   wx.previewImage({
  //     //当前显示图片
  //     current: imgs[index],
  //     //所有图片
  //     urls: imgs
  //   })
  // },
  /**
   * 生命周期函数--监听页面初次渲染完成
   */
  onReady: function () {

  },

  /**
   * 生命周期函数--监听页面显示
   */
  onShow: function () {

  },

  /**
   * 生命周期函数--监听页面隐藏
   */
  onHide: function () {

  },

  /**
   * 生命周期函数--监听页面卸载
   */
  onUnload: function () {

  },

  /**
   * 页面相关事件处理函数--监听用户下拉动作
   */
  onPullDownRefresh: function () {

  },

  /**
   * 页面上拉触底事件的处理函数
   */
  onReachBottom: function () {

  },

  /**
   * 用户点击右上角分享
   */
  onShareAppMessage: function () {

  }
})
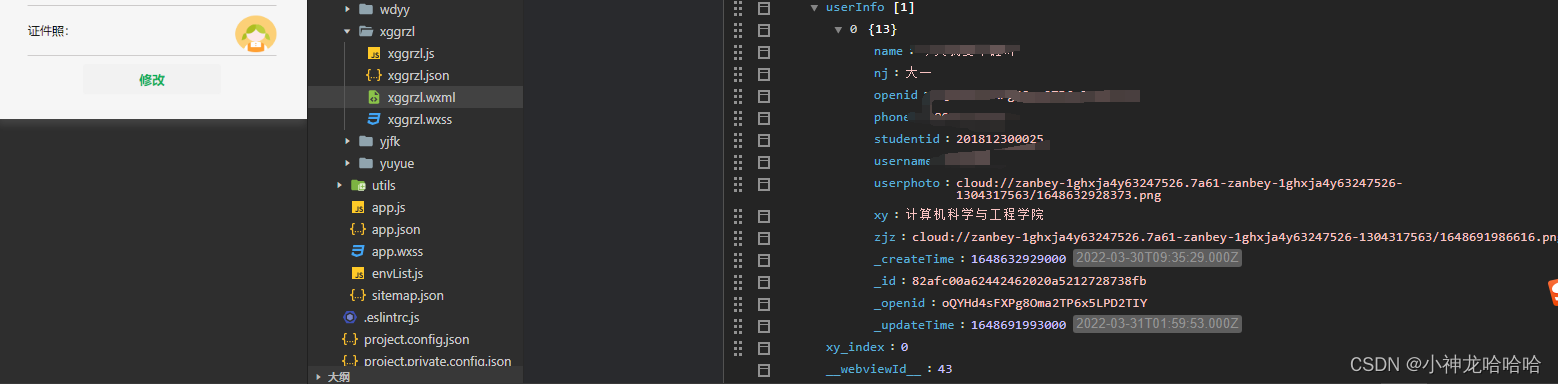
目前实现的效果
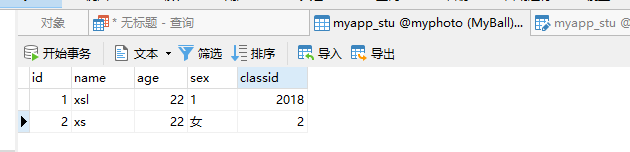
数据库中的记录如下:
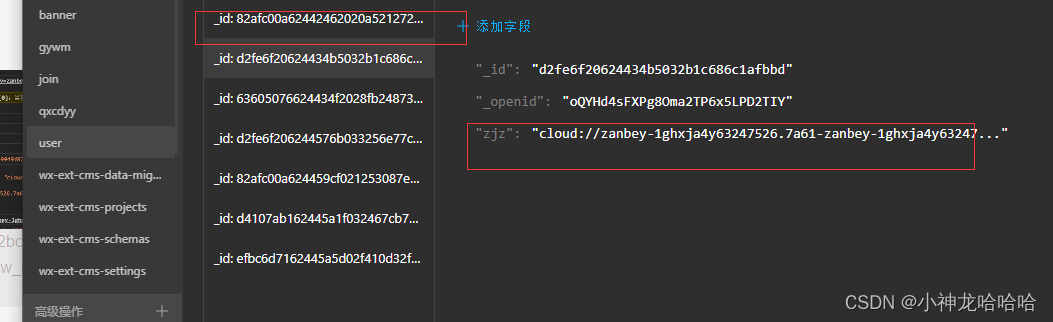
每上传一次图片就会在数据库中增加一条记录,我希望上传一次之后它可以添加到user数据库中的第一条记录中(第一条记录有zjz这个字段)
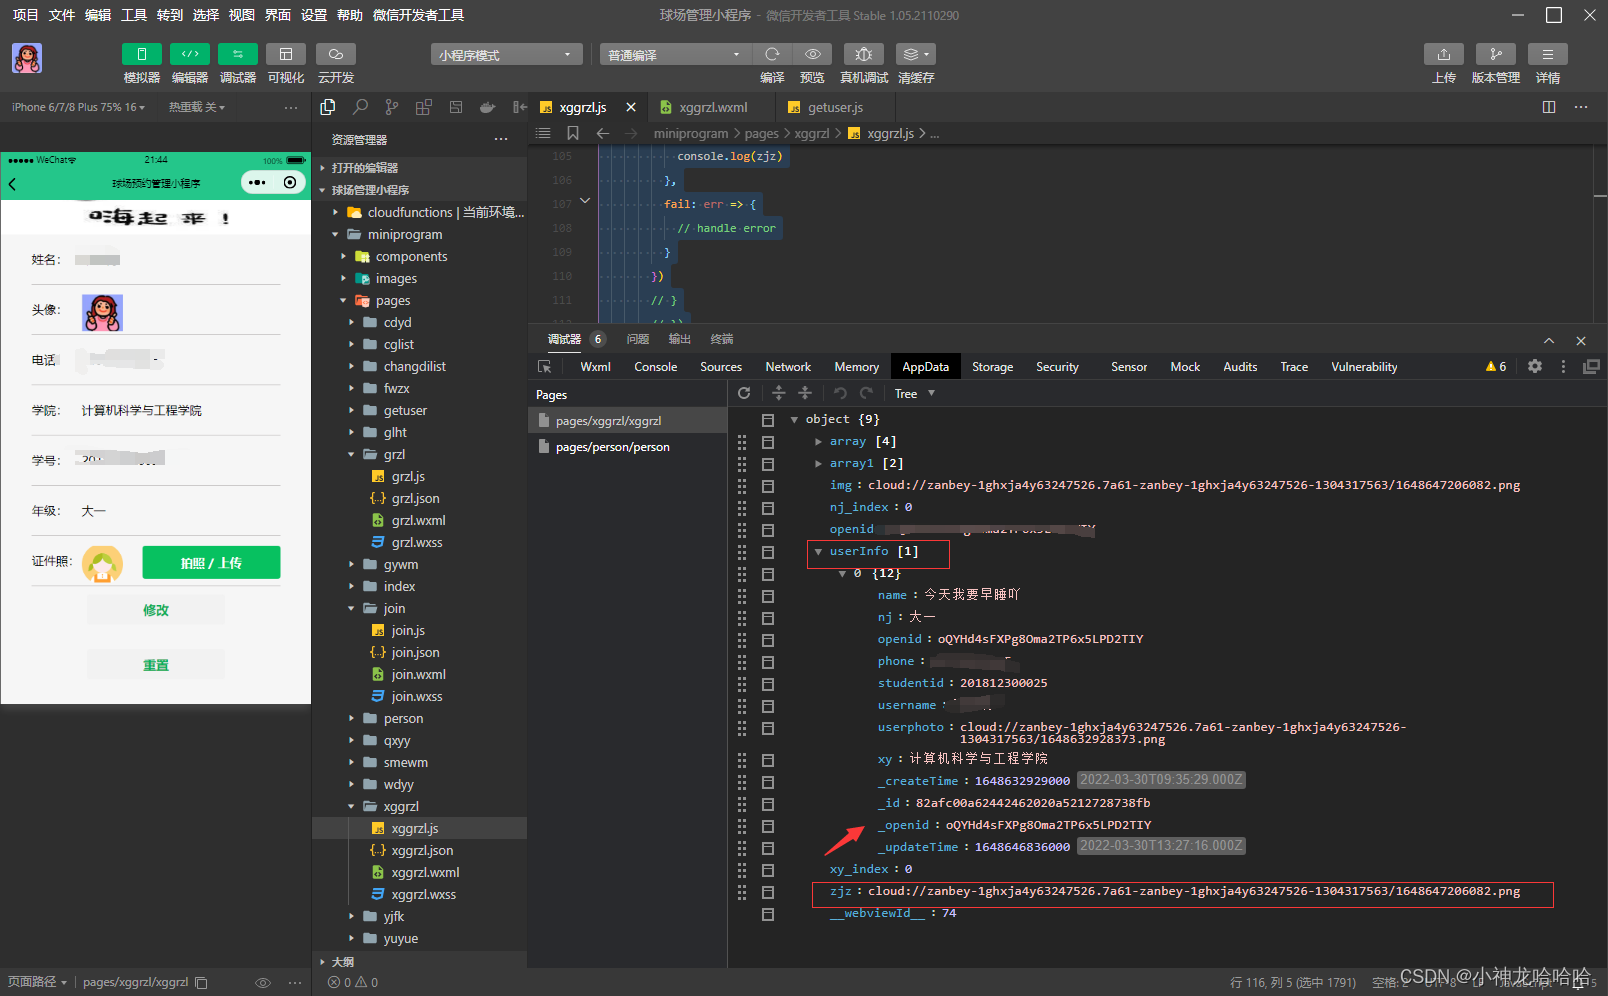
求问怎么把获取到的这个“zjz”字段放进去userinfo记录中?
20220331上午更新:
昨晚睡前也还是查了很多资料,回宿舍路上想到我应该在更新中直接上传就可以,所以把插入数据库操作注释掉了,然后一直试更新操作中的数据,突然就成功写入数据库了。
js代码:
// 上传一张图片
  chooseImg: function (e) {
    /* const app = getApp()
     var openid = app.globalData.openid
     this.setData({
       openid: openid
     })
     db.collection("user").where({ openid: this.data.openid }).get().then(res => {
       console.log(res.data)
       this.setData({
         userInfo: res.data
       })
       if(res.data.openid==app.globalData.openid){
         */
    var that = this;
    let openid = app.globalData.openid || wx.getStorageSync('openid');
    console.log(openid)
    // const filepath=this.data.img
    // 选择图片
    wx.chooseImage({
      count: 1,
      sizeType: ['original', 'compressed'], // 可以指定是原图还是压缩图,默认二者都有
      sourceType: ['album', 'camera'], // 可以指定来源是相册还是相机,默认二者都有
      success: function (res) {
        console.log(res.tempFilePaths)
        let filePath = res.tempFilePaths[0]
        // 上传图片
        wx.cloud.uploadFile({
          cloudPath: (new Date()).valueOf() + '.png',//文件名 //云存储图片名字
          filePath,//临时路径:filepath
          success: res => {
            console.log('[上传图片] 成功:', res)
            console.log(res.fileID)
            that.setData({
              img: res.fileID,//云存储图片路径,可以把这个路径存到集合,要用的时候再取出来
              // zjz:res.tempFilePaths
              // zjz: res.fileID
            })
            // let fileID = res.fileID;
            // that.upload(res.fileID);//如果存在这句话,下文用zjz:fileID数据库也不会新增记录
            // db.collection("user").add({
              // data: {
              //  zjz: fileID//数据库会新增一个记录
              //  zjz:filePath//数据库不会新增一个记录
              // zjz:this.data.concat(filePath)
              // }
            // })
          },
          fail: err => {
            // handle error
          }
        })
        // }
        // })
      }
    })

  },
formSubmit(e) {
    console.log(e.detail.value)
    db.collection("user").where({ openid: this.data.openid }).update({
      data: {
        nj: this.data.array[this.data.nj_index],
        phone: e.detail.value.phone,
        username: e.detail.value.name,
        xy: this.data.array1[this.data.xy_index],
        studentid: e.detail.value.xh,
        // tx:e.detail.value.userphoto,
        zjz:this.data.img,
        // zhengjianzhao:e.data.imgs,
        _updateTime: Date.parse(new Date()),
      },
      success: function (res) {
        wx.showToast({
          title: '提交成功',
          icon: 'success',
          duration: 1500,
          success: function () {
            wx.navigateTo({
              url: '../grzl/grzl',
            })
          }
        })
      }
    })
  },
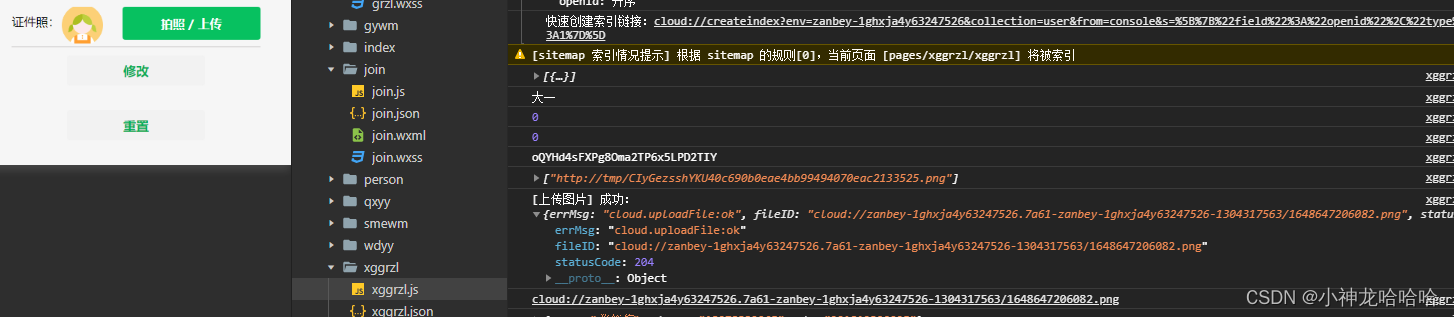
前端
<view class="row">
        <view class="text1">证件照:</view>
        <image class="zp"  src="{{userInfo[0].zjz}}" mode="aspectFill" name="zjz"></image>
        <button class="upload-img-btn" bindtap="chooseImg" type='primary'>拍照  / 上传</button>
    </view>
实现的效果: